


19th January 2012
My process
Some Illustrators are pretty guarded when it comes to their work methods, probably because they’ve developed a super cool new Photoshop or Illustrator trick that’s integral to their work! Safe to say there’s no such magic or technical wizardry involved in my creative process, so I’m always more than happy to reveal what goes on in the studio. It’s just about picking the right tools and putting pen to paper…
Pencil
Every drawing starts in pencil.
I favour a rotary pencil (a pink Hello Kitty one from Tokyo) with an HB 0.5mm lead.

Paper
I draw on A3 layout paper (Daler Rowney pads are my favourite)
I have an A3 scanner so this makes transferring the drawing into Photoshop easier.
For large scale pieces I tape a few sheets of A3 together – easier for scanning than trying to line up an A2 sheet.
Layout paper is thin enough to work with multiple layers but heavy enough to absorb the ink without crinkling.
Most importantly though, it has a perfectly smooth surface so the pen nib doesn’t drag and feather the ink.
I use bleached white paper as it scans the clearest (no fuzzy backgrounds).
Scale
Wherever possible, I always draw bigger than the final print size (not when illustrating billboards etc obviously!).
I draw at least 50% bigger than the final required size so that when I scale down on the computer, the details crisp up and gives a really tight, precise finish.
Sketch
Sometimes I’ll do a very quick layout sketch on A4 to help plan composition.
More often than not though, I’ll just pick a spot on the paper, start drawing and let the piece grow organically.
I draw an outline, whether it be a circle, square or damask shape so I have a rough idea of where to draw up to.
If the final piece is to be symmetrical I’ll just drawn half, then copy and flip it in Photoshop later.


The pencil drawing is quite rough at this stage – basic shapes and lines, no detailing or shading.
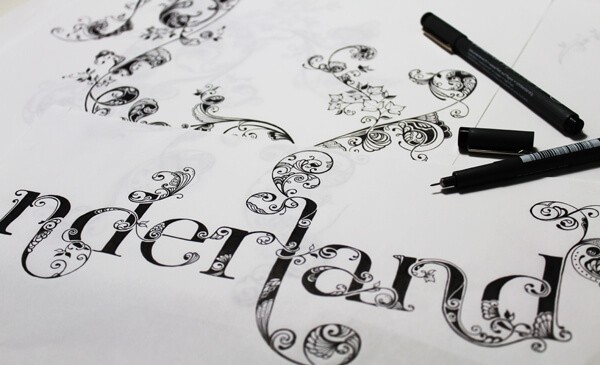
Ink
When the pencil drawing is complete, I place a fresh sheet of paper over the top and begin to ink.

I use Steadtler fineliners (usually 0.2’s and 0.05’s) to redraw the pencil sketch, this time adding all the detailing, pattern fills and areas of block filled black.
I used to ink directly over the top of the graphite drawing and erase the pencil before scanning but found that rubbing out the pencil lines effected the opacity and crispness of the ink.
It takes a little longer to ink from scratch but the final drawing is much crisper.


Scan
Inking complete, now I scan to Photoshop at 300dpi – 1200dpi depending on the final application (1200 if the image has to scale up significantly larger for billboards etc).
I scan as a colour image (not black and white), then adjust in Photoshop – I’ve found this gives the clearest image.
If the drawing is big, I scan in sections and re-assemble digitally.
I use a Wacom Intuos on my mac. I had a brief flutter with the Inkling. It didn’t go well.
Photoshop
In Photoshop I desaturate and adjust the brightness and contrast of the artwork to get it really crisp and monochromatic.
I use the erase tool to get rid of any smudgy fingerprints and tea spillages.
Any final tweaks are done digitally, this usually involves some sort of cut / copy, scale, flip, rotate, paste functions.
I use Photoshop to polish off the hand drawing as opposed to create with it.
Save
Send
And that’s it!

I made a little time lapse video of the pencil to print process for the release of my Lunar Botanica print which you can see here.
Lunar Botanica is now sold out, but Wonderland is available to buy here.
As you can see, there’s no trade secrets or super complicated techniques just some simple tricks and lessons I’ve learned over the years.
For anyone contemplating picking up a pen and creating something inky, I’d say go for it! You don’t need to be a computer genius or have loads of expensive kit to create something cool, just grab a few pens and pencils and give it a shot.
J

